
Resizing partitions becomes essential when the system partition is running out of space, as it avoids the need to recreate partitions and restore data from backups. Performing these operations avoids long server downtimes. There are multiple methods available to reallocate disk space safely. This article explains how to add space to the C drive in Windows Server 2019/2022 with native tools and safe partition software.
Add Space to the C Drive Without Software
The native Disk Management utility and the DiskPart command-line tool can resize partitions without data loss. However, these tools only function under specific conditions. Disk Management provides a graphical interface, while DiskPart runs through the command prompt. Although they operate through different interfaces, they share the same limitations when resizing partitions. This section explains how to add space to the C drive using Disk Management. If you prefer utilizing the command-line utility, follow these guides:
- How to shrink partition with DiskPart in Windows Server 2019
- How to extend partition with DiskPart in Windows Server 2019
To add space to the C drive via Disk Management, your configuration must meet all requirements below:
- There is a contiguous partition (such as D:) to the right of the C drive.
- No applications are installed on this contiguous volume, allowing you to delete it safely.
- An alternate storage partition is available to transfer your existing files.
- The contiguous partition on the right (or drive E in some cases) must be a Primary partition.
Steps to add space to the C drive in Windows Server 2019/2022 via Disk Management:
- Transfer all files in the right adjacent partition D (or E) to another location.
- Press Windows + X on your keyboard, and then select Disk Management from the list.
- Right-click drive D: and select Delete Volume to convert its space into Unallocated.
- Right-click the system C: drive and select Extend Volume.
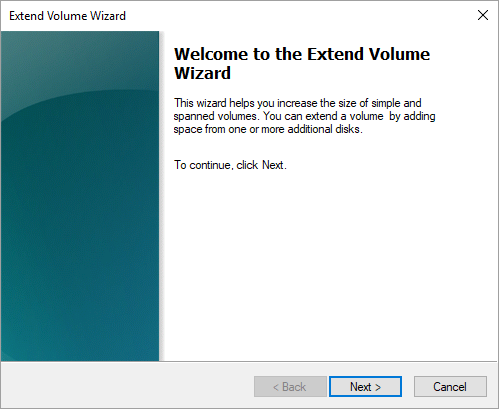
- Click Next through the wizard prompts until you hit Finish to complete the extension.
If you cannot remove the right adjacent partition or if it is configured as a logical drive, utilizing third-party management software becomes necessary.
Add Space to the C Drive from D or E on the Same Disk
Before resizing partitions, creating a system backup and selecting secure utilities is highly recommended. Modifying partition sizes carries potential filesystem damage or data loss risks. Compared to other tools, NIUBI Partition Editor provides advanced technologies to protect system and data:
- Virtual Mode - all operations will be listed as pending for preview, and real disk partitions won't be modified until you click "Apply" to confirm.
- Cancel-at-will - if you applied wrong operations, you can cancel the ongoing operations at any point before finishing.
- 1-Second Rollback - if any known error is detected while resizing partitions, it automatically reverts the server to its original status instantly.
- Hot-Clone - clone the system disk in Windows without interrupting the server; you can boot from the cloned disk immediately when the original disk fails.
Steps to add free space to the C drive in Windows Server 2019/2022 from D or E:
- Download NIUBI Partition Editor, right-click the contiguous partition D: (or E:) and select "Resize/Move Volume." In the pop-up window, drag the left border rightward or input a value in "Unallocated space before" to shrink the volume and generate Unallocated space on its left side.
- Right-click the system C: drive and select "Resize/Move Volume" again, then drag the right border rightward to merge this Unallocated space.
- Click Apply on the top left to execute the changes.

- If you intend to add free space from a non-adjacent partition, an additional step to move Unallocated space is required before merging it into the C drive.
- This software works in virtual mode; real disk partitions will not be modified until you click Apply to confirm.
- If you use any type of hardware RAID array, do not modify the array or controller. Just follow the same steps above.
Add Free Space to the C Drive Using Another Disk
On some servers, there are no other partitions on the system disk, or the entire disk does not have enough free space. In this case, no software can transfer space from a different physical disk. You can clone this disk to a larger one to get extra Unallocated space, and then merge it into the C drive or other partitions. Follow the steps in the video below:
Add Disk Space to the C Drive in VMware/Hyper-V
When running Windows Server 2019/2022 as a virtual machine in VMware or Hyper-V, first check if there is free space in any other partition on the same virtual disk. If there is, simply follow the methods above to resize partitions.
If the entire virtual disk is full, you can expand its size directly using VMware or Hyper-V tools. After expanding, additional space will be shown as Unallocated at the end of the disk. You can then move and merge this Unallocated space into the C drive.
Besides shrinking, extending, moving, and cloning partitions, NIUBI Partition Editor helps you perform many other disk and partition management operations.
 © 2009 - NIUBI Technology All Rights Reserved. |