
Sometimes, server administrators need to shrink a volume in Windows Server 2016. For example, a partition may have been created too large. To optimize space usage, you can shrink it to create more volumes. Another typical example is when the C drive runs out of space. In this situation, you need to shrink another volume to make unallocated space and then add it to the C drive. To shrink a volume in Windows Server 2016 without losing data, there are two kinds of tools available: the native Disk Management utility and third-party disk partition software. This article explains how to shrink a partition in Windows Server 2016 using both kinds of tools.
Shrink Volume in Windows Server 2016 Without Third-Party Software
Starting with Windows Server 2008, Microsoft added the "Shrink Volume" function to the native Disk Management tool. This function is able to decrease a partition and create unallocated space without losing data. However, only NTFS partitions are supported. Windows Server 2016 inherits the same function without any improvements, so you cannot shrink a partition in Windows Server 2016 in certain cases.
How to Shrink Volume in Windows Server 2016 via Disk Management:
- Press the Windows + X keys together on your keyboard and click Disk Management from the list.
- Right-click the NTFS partition that you want to decrease and select Shrink Volume.
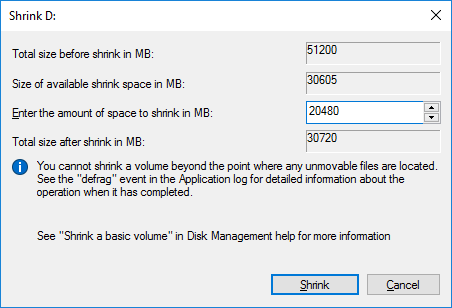
- Enter an amount of space and click Shrink to execute. If you don't enter an amount, the maximum available free space will be used.
![Shrink partition]()
After a short while, the D drive in my test server shrank from 50GB to 30GB. The 20GB of free space is converted to unallocated space on the right side.
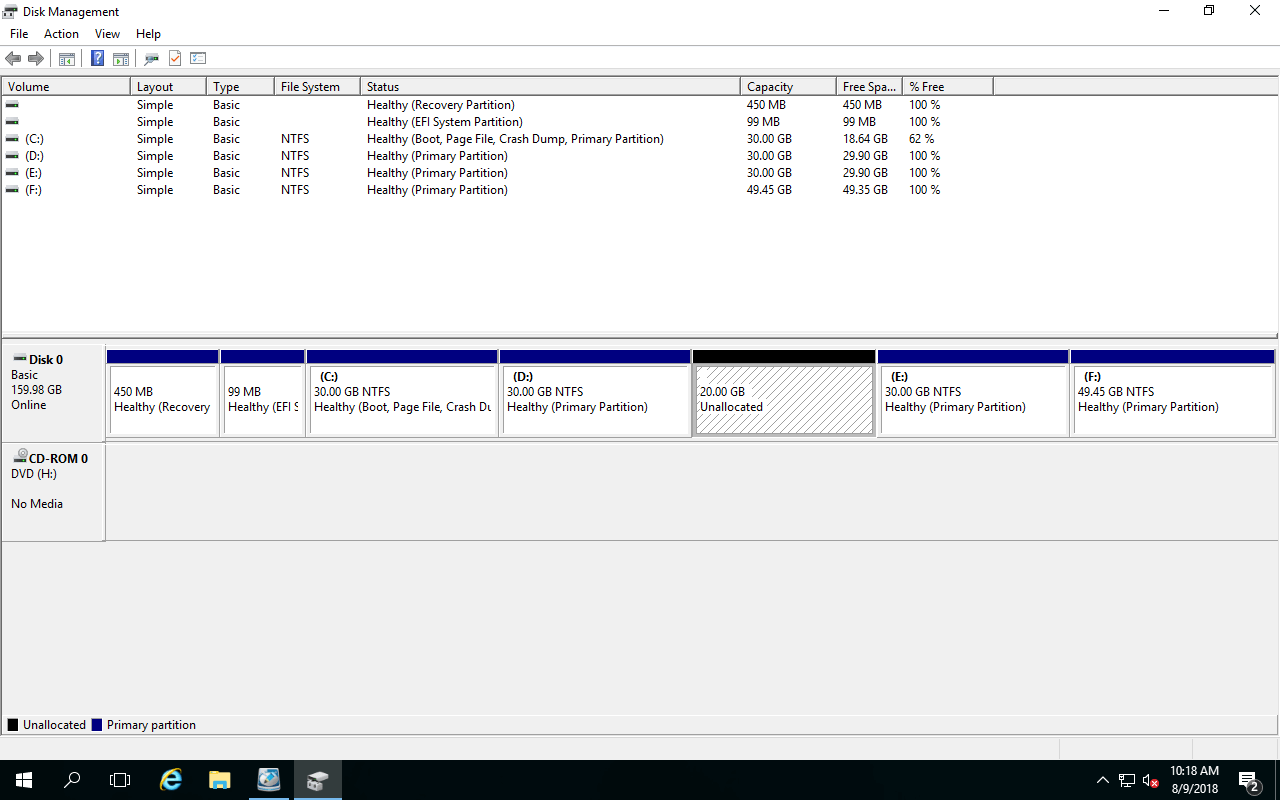
Disk Management only gives you an option to enter an amount; you cannot decide whether to create the unallocated space on the left or right side. This causes a serious issue because this unallocated space cannot be used to extend another partition. The Disk Management "Extend Volume" function can only merge unallocated space into the left contiguous partition.
Cases Where You Are Unable to Shrink Volume Using Built-in Tool
Many server administrators encounter the issue where they cannot shrink a volume in Server 2016 with Disk Management because the "Shrink Volume" option is disabled.
Reason 1: Only NTFS Partition Is Supported
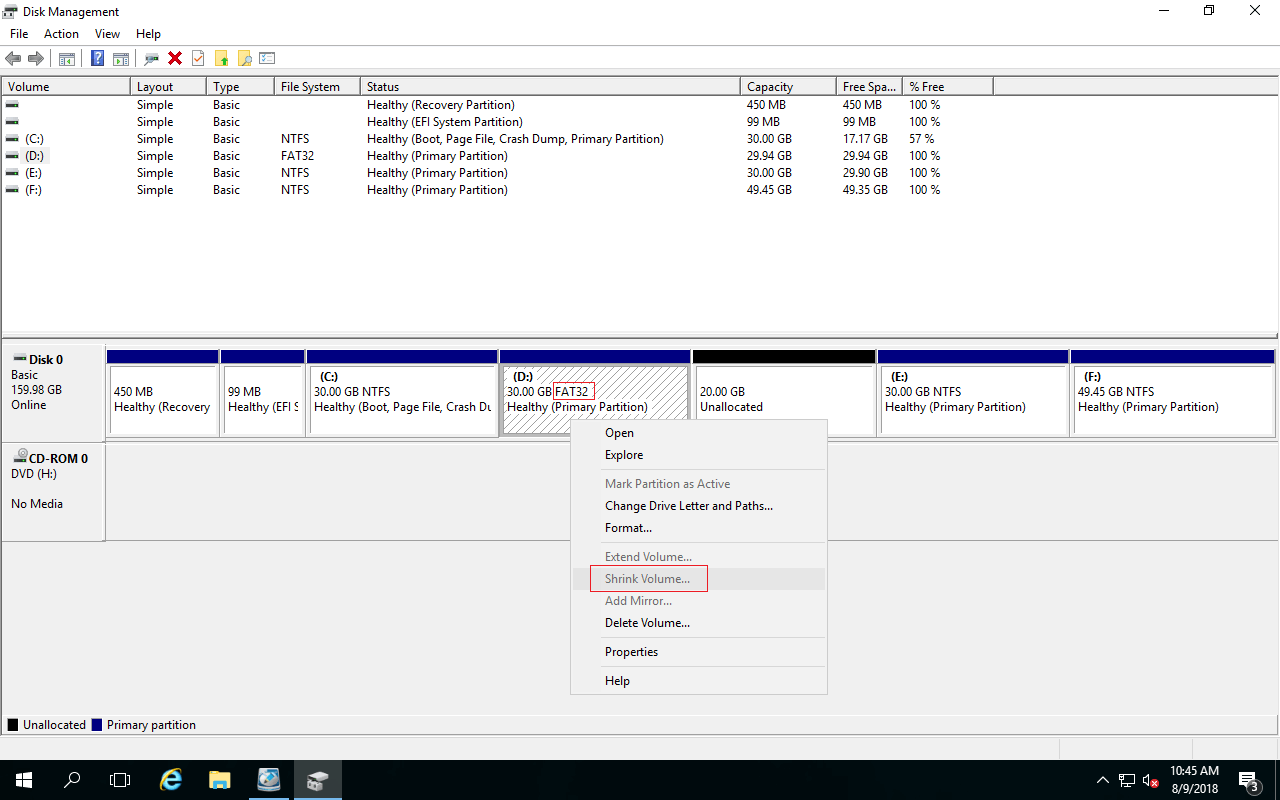
As mentioned above, Disk Management can only shrink NTFS partitions. Another common format, FAT32 partitions, along with any other types of partitions, cannot be shrunk. To demonstrate this, I formatted the D: drive from NTFS to FAT32 in my test server. As you can see, Shrink Volume is greyed out for this partition.
Reason 2: File System Error
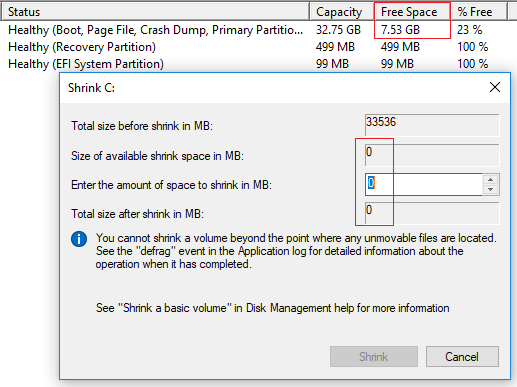
Sometimes, when there is a file system error in a partition, Disk Management will not allow you to shrink it. As you can see in the screenshot, there is 7.53GB of free space in the system C drive, but in the shrinking window, the available free space is shown as 0.
Reason 3: There Are Unmovable Files
In this situation, the Shrink Volume function still works, but it offers very little available space to shrink, even though there is a large amount of free space. Have you noticed the message in the shrink volume window - "You cannot shrink a volume beyond the point where any unmovable files are located"?
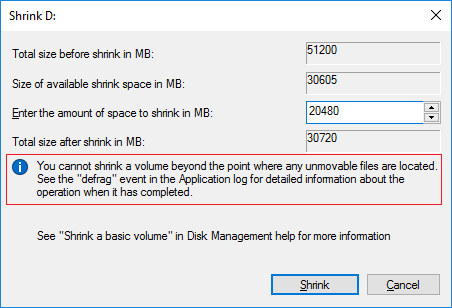
Compared to data volumes, you are much more likely to encounter this issue while shrinking system partition C. This is because unmovable files, including the Page File, Hibernation file, and other large system files, are all located in the C: drive by default.
A Better Way to Shrink Partition in Windows Server 2016
To shrink a partition in Windows Server 2016, NIUBI Partition Editor is a better choice. Compared to Disk Management, NIUBI has many advantages, such as:
- It is able to create unallocated space on either the left or right side when shrinking a partition.
- It is able to shrink a partition to a smaller size because it can move the "unmovable" files.
- It supports shrinking and extending both NTFS and FAT32 partitions.
- It is much easier to use; you just need to drag and drop on the disk map to shrink and extend a partition.
- Unallocated space can be combined into either contiguous or non-adjacent partitions on the same disk.
How to Shrink Partition in Windows Server 2016 Without Losing Data:
- Download NIUBI Partition Editor, right-click the partition that you want to shrink, and then select "Resize/Move Volume".
- Drag either border towards the other side in the pop-up window, and the partition will be shrunk. (Note: If you want to expand the C drive, shrink the D drive and create the unallocated space on the left side.)
- Click Apply on the top left to confirm and execute. (All operations before clicking Apply only work in virtual mode.)
Watch the video on how to shrink Server 2016 partitions:

If you want to create a new volume after shrinking a partition, right-click the unallocated space and select "Create Volume". Follow these steps if you want to extend a volume in Windows Server 2016 after shrinking another one.
In Summary
Because of its inherent limitations, Windows Disk Management can only help you shrink an NTFS partition to create a new volume, or extend an NTFS partition by deleting the right contiguous partition. To shrink a volume in Windows Server 2016/2019/2022/2003/2008/2012, NIUBI Partition Editor is a better choice. It is much safer and faster because of its unique 1-Second Rollback, Virtual Mode, Cancel-at-will technologies, and advanced file-moving algorithm. Besides shrinking partitions, it helps you perform many other disk partition management operations.
 © 2009 - NIUBI Technology All Rights Reserved. |